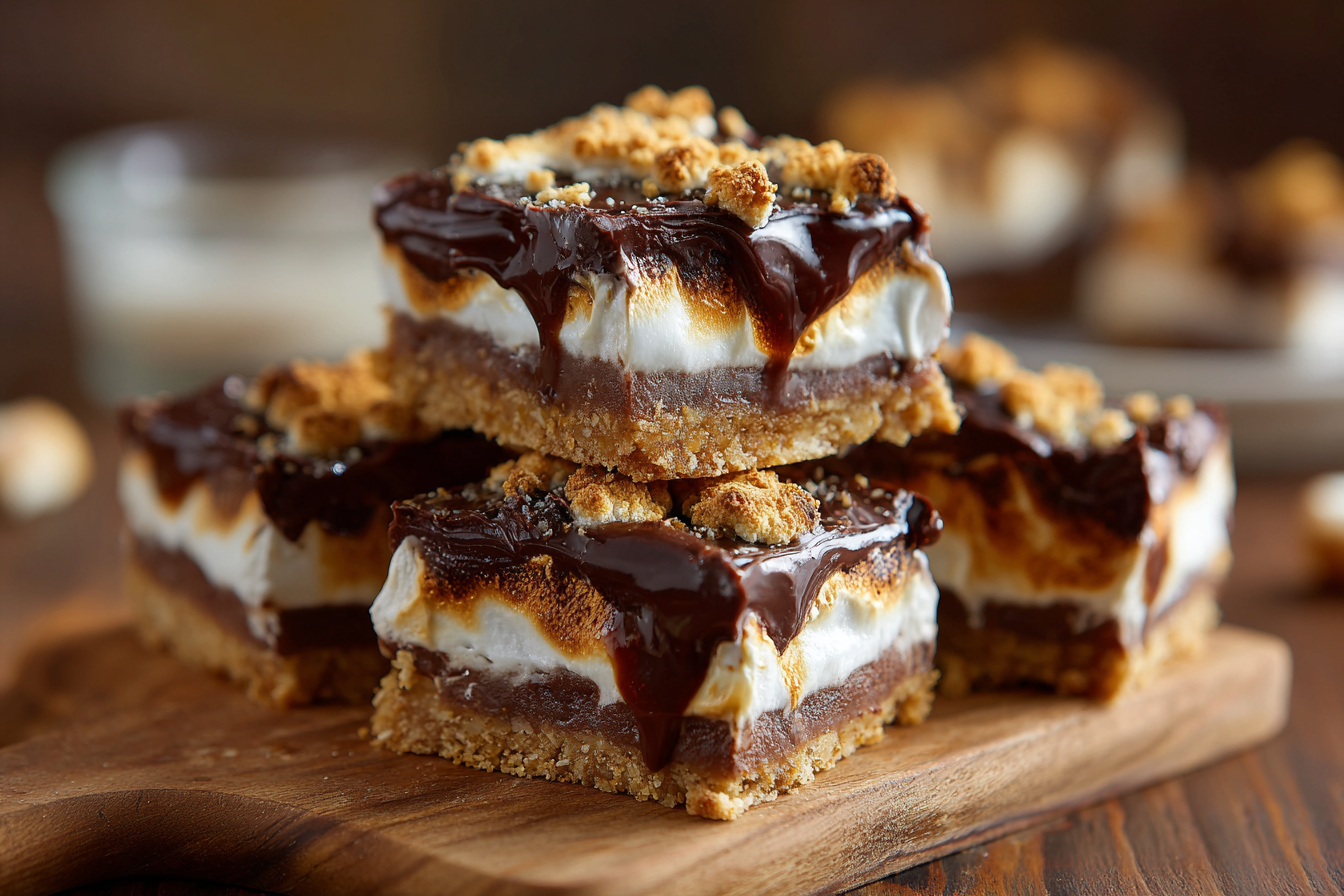
Gooey, Chocolatey, Toasted Marshmallow Bars That Taste Like Summer Campfire Memories
Creamy S’mores Bars Recipe
There’s something nostalgic about s’mores that instantly brings people back to warm summer nights, crackling campfires, sticky fingers, and melted chocolate dripping between graham crackers. Even people who haven’t eaten s’mores in years still remember the feeling of sitting outside under the stars while trying not to burn marshmallows over an open flame.
That’s exactly the feeling these Creamy S’mores Bars were created to bring back.
The first time I made this recipe was during a late summer weekend when the weather still felt warm enough to sit outside after sunset. I wanted a dessert that tasted comforting and nostalgic without the hassle of building a campfire or making individual s’mores one by one. Instead of the classic version, I layered buttery graham cracker crust, rich melted chocolate, fluffy marshmallow cream, and gooey toasted topping together into bars that could easily feed a crowd.
The moment they came out of the oven, the kitchen smelled unbelievable. Warm chocolate, toasted marshmallow, buttery graham crackers — it smelled exactly like summer memories wrapped into one dessert.
And honestly? These bars disappeared faster than almost any dessert I’ve ever made.
That’s the magic of s’mores desserts. They combine simple ingredients in a way that feels comforting, rich, fun, and completely irresistible. The crunchy graham cracker base, silky melted chocolate, creamy marshmallow layer, and slightly toasted topping create a dessert that somehow feels both cozy and indulgent at the same time.
What makes these Creamy S’mores Bars even better is how easy they are to make. You get all the flavor of classic campfire s’mores without needing a fire pit, skewers, or messy hands.
And for Pinterest? These bars are almost perfect.
The melted chocolate layers, toasted marshmallow tops, gooey texture, and bakery-style presentation instantly attract clicks because people can practically taste the dessert just by looking at it.
Why You’ll Love These Creamy S’mores Bars
These bars have everything people love about traditional s’mores but in a rich layered dessert form that’s easier to serve and even more satisfying.
They’re:
- gooey and chocolatey,
- easy to make,
- perfect for summer parties,
- beginner-friendly,
- great for bake sales,
- ideal for holidays,
- and completely crowd-pleasing.
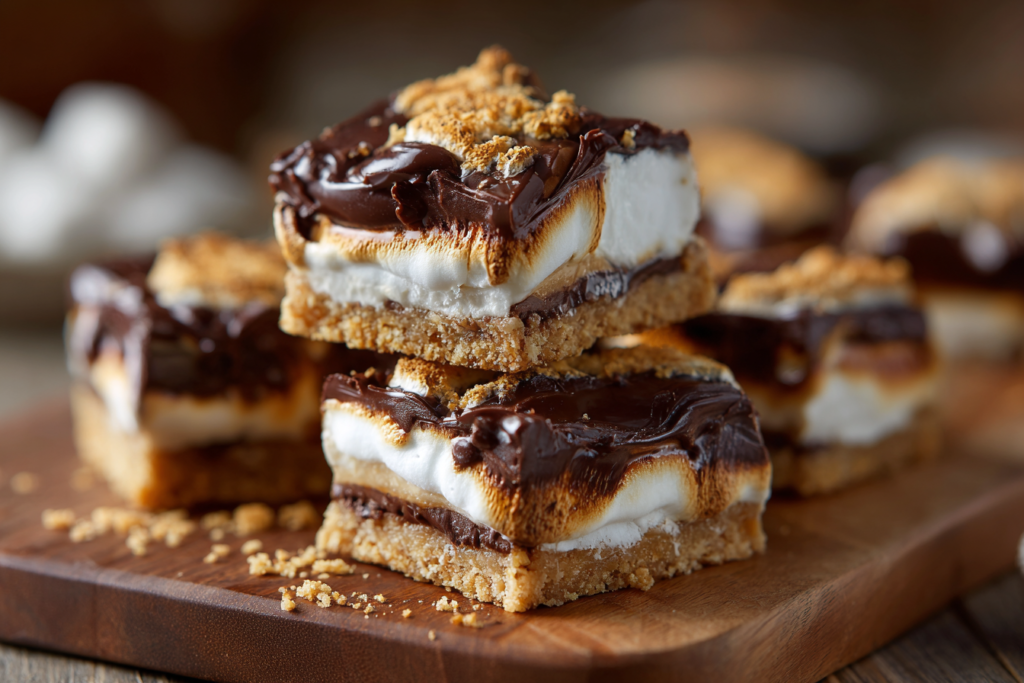
Unlike regular cookies or brownies, these bars create multiple textures in every bite. The buttery graham cracker crust stays slightly crisp underneath the creamy marshmallow filling, while the melted chocolate creates rich pockets of sweetness throughout the bars.
And the toasted marshmallow topping? That’s what truly makes this recipe unforgettable.
Ingredients You’ll Need
For the Graham Cracker Crust
- 2 cups graham cracker crumbs
- ½ cup melted butter
- ¼ cup brown sugar
For the Chocolate Layer
- 2 cups semi-sweet chocolate chips
- ½ cup heavy cream
For the Marshmallow Layer
- 2 cups marshmallow fluff
- 4 oz cream cheese, softened
- 1 teaspoon vanilla extract
For the Topping
- Mini marshmallows
- Crushed graham crackers
- Melted chocolate drizzle
The Secret to the Best S’mores Bars
One of the biggest mistakes people make with s’mores desserts is focusing only on sweetness.
Real bakery-style s’mores bars need balance.
That balance comes from:
- slightly salty butter,
- rich dark chocolate flavor,
- creamy marshmallow texture,
- and crunchy graham crackers.
Using semi-sweet chocolate instead of overly sweet milk chocolate helps create a deeper flavor that prevents the bars from becoming too sugary.
The cream cheese inside the marshmallow layer also helps stabilize the filling while adding a creamy cheesecake-like texture that makes these bars feel richer and more luxurious.
How to Make Creamy S’mores Bars
Step 1: Prepare the Pan
Preheat your oven to 350°F.
Line a baking pan with parchment paper for easier removal later.
This small step makes cutting clean bakery-style bars much easier.
Step 2: Make the Graham Cracker Crust
In a large bowl, mix graham cracker crumbs, melted butter, and brown sugar until the texture resembles wet sand.
Press the mixture firmly into the bottom of the prepared baking pan.
Bake for about 8 minutes until lightly golden.
The smell alone already starts feeling like homemade summer desserts.
Step 3: Create the Chocolate Layer
Heat heavy cream until warm but not boiling.
Pour over chocolate chips and stir until smooth and glossy.
Spread the chocolate evenly over the cooled graham cracker crust.
This layer creates that rich gooey chocolate center everyone loves in classic s’mores.
Step 4: Make the Creamy Marshmallow Layer
In a mixing bowl, combine marshmallow fluff, softened cream cheese, and vanilla extract until smooth.
The texture becomes incredibly creamy and fluffy — almost like marshmallow cheesecake filling.
Spread gently over the chocolate layer.
Step 5: Add Toppings
Top generously with mini marshmallows and crushed graham crackers.
Bake for another 10–12 minutes until the marshmallows turn lightly golden.
If you want an even toastier appearance, broil for 1–2 minutes carefully.
Why These Bars Perform So Well on Pinterest
Pinterest users love desserts that create strong visual cravings.
These Creamy S’mores Bars naturally do that because they combine:
- melted chocolate,
- toasted marshmallows,
- gooey texture,
- layered presentation,
- and nostalgic comfort food feelings.
The toasted marshmallow tops instantly catch attention while scrolling. People can almost imagine pulling apart the gooey chocolate layers just by seeing the image.
That emotional visual connection is exactly why s’mores desserts perform so well on Pinterest every summer.
Tips for Bakery-Style S’mores Bars
Chill Before Slicing
Cooling helps create cleaner layers.
Use High-Quality Chocolate
Better chocolate creates richer flavor.
Don’t Overbake
The marshmallows should stay soft and gooey.
Add Extra Chocolate Drizzle
This makes the bars look even more Pinterest-worthy.
Delicious Variations
Peanut Butter S’mores Bars
Add peanut butter between the chocolate layers.
Oreo S’mores Bars
Use crushed Oreos inside the crust.
Salted Caramel S’mores Bars
Drizzle caramel sauce before baking.
Dark Chocolate Espresso Bars
Add espresso powder for richer chocolate flavor.
Perfect Occasions for These Bars
These bars are perfect for:
- summer BBQs,
- birthday parties,
- bake sales,
- family gatherings,
- movie nights,
- camping weekends,
- and holiday dessert tables.
They’re especially popular during:
- Memorial Day,
- Fourth of July,
- Labor Day,
- and cozy late-summer evenings.
How to Store Creamy S’mores Bars
Refrigerator
Store covered for up to 5 days.
Freezer
Freeze individual bars for up to 2 months.
The bars taste amazing slightly chilled because the chocolate becomes rich and fudgy.
Frequently Asked Questions
Can I make these ahead of time?
Absolutely. They’re even better after chilling.
Can I use milk chocolate?
Yes, but semi-sweet chocolate creates better balance.
Why are my bars messy?
They usually need more cooling time before slicing.
Can I use homemade marshmallow fluff?
Yes, homemade versions work beautifully.
Final Thoughts
Some desserts feel fancy and elegant. Others feel warm, nostalgic, messy, and impossible not to love.
Creamy S’mores Bars belong completely in that second category.
They bring together everything people love about classic summer s’mores — melted chocolate, toasted marshmallows, buttery graham crackers, and rich comfort-food flavor — in an easy layered dessert that looks bakery-worthy while still feeling homemade.
Whether you make them for a summer gathering, movie night, birthday party, or simply because you’re craving something chocolatey and comforting, these bars always bring people back for another piece.
And honestly? The combination of gooey marshmallow and melted chocolate never really goes out of style.
Coconut Cake Recipe
Soft, Fluffy, Bakery-Style Coconut Cake Filled with Creamy Frosting and Tropical Flavor
Some cakes are rich and heavy. Others feel light, soft, elegant, and almost impossible to stop eating after the first bite.
Coconut Cake is one of those desserts.
The first time I truly fell in love with coconut cake was during a family celebration many years ago. Someone brought out a tall homemade cake covered in fluffy frosting and toasted coconut flakes, and at first glance it looked simple compared to the chocolate desserts sitting nearby.
Then I tasted it.
The cake layers were unbelievably soft and moist, the frosting was creamy without feeling too heavy, and the coconut flavor gave the entire dessert a fresh tropical sweetness that felt lighter than traditional buttercream cakes.
What surprised me most was how balanced it tasted. Sweet, but not overpowering. Rich, but still airy. Elegant without trying too hard.
Ever since then, Coconut Cake has remained one of my favorite homemade desserts for spring and summer celebrations. It feels timeless, comforting, and beautiful in a way that never really goes out of style.
And honestly? A perfectly made coconut cake feels like something straight from a bakery window.
The fluffy layers, creamy frosting, toasted coconut topping, and soft vanilla flavor create a dessert that looks impressive while still feeling warm and homemade.
That’s exactly why this recipe has become such a favorite in my kitchen.
Why Everyone Loves Coconut Cake
One of the reasons Coconut Cake is so loved is because it has a lighter flavor profile compared to dense chocolate cakes.
The coconut adds sweetness and texture without making the dessert feel too rich.
This cake is:
- soft and fluffy,
- beautifully moist,
- elegant enough for celebrations,
- perfect for spring and summer,
- beginner-friendly,
- and incredibly Pinterest-worthy.
It also photographs beautifully because the white frosting and toasted coconut create a clean bakery-style appearance that instantly attracts attention online.
Ingredients You’ll Need
For the Cake Layers
- 2 ½ cups all-purpose flour
- 2 teaspoons baking powder
- ½ teaspoon salt
- 1 cup unsalted butter, softened
- 1 ¾ cups sugar
- 4 eggs
- 1 tablespoon vanilla extract
- 1 cup coconut milk
- 1 cup shredded coconut
For the Frosting
- 8 oz cream cheese
- ½ cup butter
- 4 cups powdered sugar
- 1 teaspoon vanilla extract
For the Topping
- Toasted coconut flakes
- Extra shredded coconut
The Secret to Soft Coconut Cake
The secret to bakery-style coconut cake is moisture.
Coconut milk helps create a softer texture than regular milk while adding subtle tropical flavor.
Another important trick is not overmixing the batter.
Overmixing develops too much gluten, which creates dense cake layers instead of soft fluffy ones.
The goal is a light, tender crumb that almost melts into the frosting.
How to Make Coconut Cake
Step 1: Prepare the Cake Pans
Preheat the oven to 350°F.
Grease and line two round cake pans with parchment paper.
This helps the cakes release easily without sticking.
Step 2: Mix the Dry Ingredients
In a medium bowl, whisk together flour, baking powder, and salt.
Set aside.
Step 3: Cream Butter and Sugar
In a large mixing bowl, beat butter and sugar until light and fluffy.
This step creates air inside the batter, helping the cake bake softer and taller.
Step 4: Add Eggs and Vanilla
Add eggs one at a time, mixing well after each addition.
Stir in vanilla extract.
The batter should already look smooth and creamy.
Step 5: Add Coconut Milk
Alternate adding dry ingredients and coconut milk slowly.
Fold in shredded coconut gently.
The batter becomes rich, soft, and lightly textured.
Step 6: Bake the Cake Layers
Divide the batter evenly between the cake pans.
Bake for about 28–32 minutes until lightly golden.
The kitchen starts smelling warm, buttery, and slightly tropical while the cake bakes.
Making the Creamy Coconut Frosting
While the cake cools, prepare the frosting.
Beat cream cheese and butter until smooth and fluffy.
Slowly add powdered sugar and vanilla extract.
The frosting should become silky, creamy, and spreadable.
Unlike heavy buttercream frosting, cream cheese frosting adds freshness and balance that pairs perfectly with coconut.
Assembling the Cake
Place one cake layer onto a serving plate.
Spread frosting evenly across the top.
Add the second layer and frost the entire cake generously.
Press toasted coconut flakes around the sides and top.
This final step transforms the cake into something that looks professionally made.
Why Coconut Cake Performs So Well on Pinterest
Pinterest users love desserts that feel:
- elegant,
- soft,
- bakery-style,
- and celebration-worthy.
Coconut Cake naturally creates that feeling.
The white frosting, fluffy texture, and toasted coconut topping give it a clean luxurious appearance that stands out while scrolling.
It also performs well during:
- Easter,
- spring baking season,
- summer parties,
- bridal showers,
- birthdays,
- and holiday gatherings.
Tips for Perfect Coconut Cake
Use Room Temperature Ingredients
This creates smoother batter.
Toast the Coconut
Toasted coconut adds deeper flavor and beautiful color.
Chill Before Slicing
Cold frosting creates cleaner cake slices.
Don’t Overbake
Softer cake layers hold moisture better.
Delicious Coconut Cake Variations
Pineapple Coconut Cake
Add pineapple filling between layers.
Lemon Coconut Cake
Add lemon zest for bright citrus flavor.
Coconut Almond Cake
Add almond extract for bakery-style flavor.
Chocolate Coconut Cake
Combine chocolate cake layers with coconut frosting.
Perfect Pairings
This cake pairs beautifully with:
- iced coffee,
- vanilla lattes,
- tropical fruit,
- iced tea,
- or coconut milk coffee drinks.
Perfect for:
- birthdays,
- weddings,
- summer parties,
- brunch tables,
- and elegant celebrations.
How to Store Coconut Cake
Refrigerator
Store covered for up to 5 days.
Freezer
Freeze unfrosted cake layers for up to 2 months.
Frequently Asked Questions
Can I use sweetened coconut?
Yes, but reduce sugar slightly.
Why is my cake dry?
Usually from overbaking.
Can I make this ahead of time?
Absolutely. Coconut cake tastes even better the next day.
Can I make cupcakes instead?
Yes, this batter works beautifully for cupcakes.
Final Thoughts
Some cakes feel trendy for a season. Others stay timeless because they create a feeling people never stop loving.
Coconut Cake is one of those timeless desserts.
The soft fluffy layers, creamy frosting, and toasted coconut topping come together to create something elegant, comforting, and incredibly satisfying without feeling overly heavy.
Whether you serve it at birthdays, summer gatherings, spring celebrations, or quiet family dinners, it always feels special in that simple homemade way people remember.
And honestly? Few desserts look as beautiful on a table while still tasting this soft and comforting in every bite.